

Documentation for Users.
Steps you need to follow
- Install GatherPress
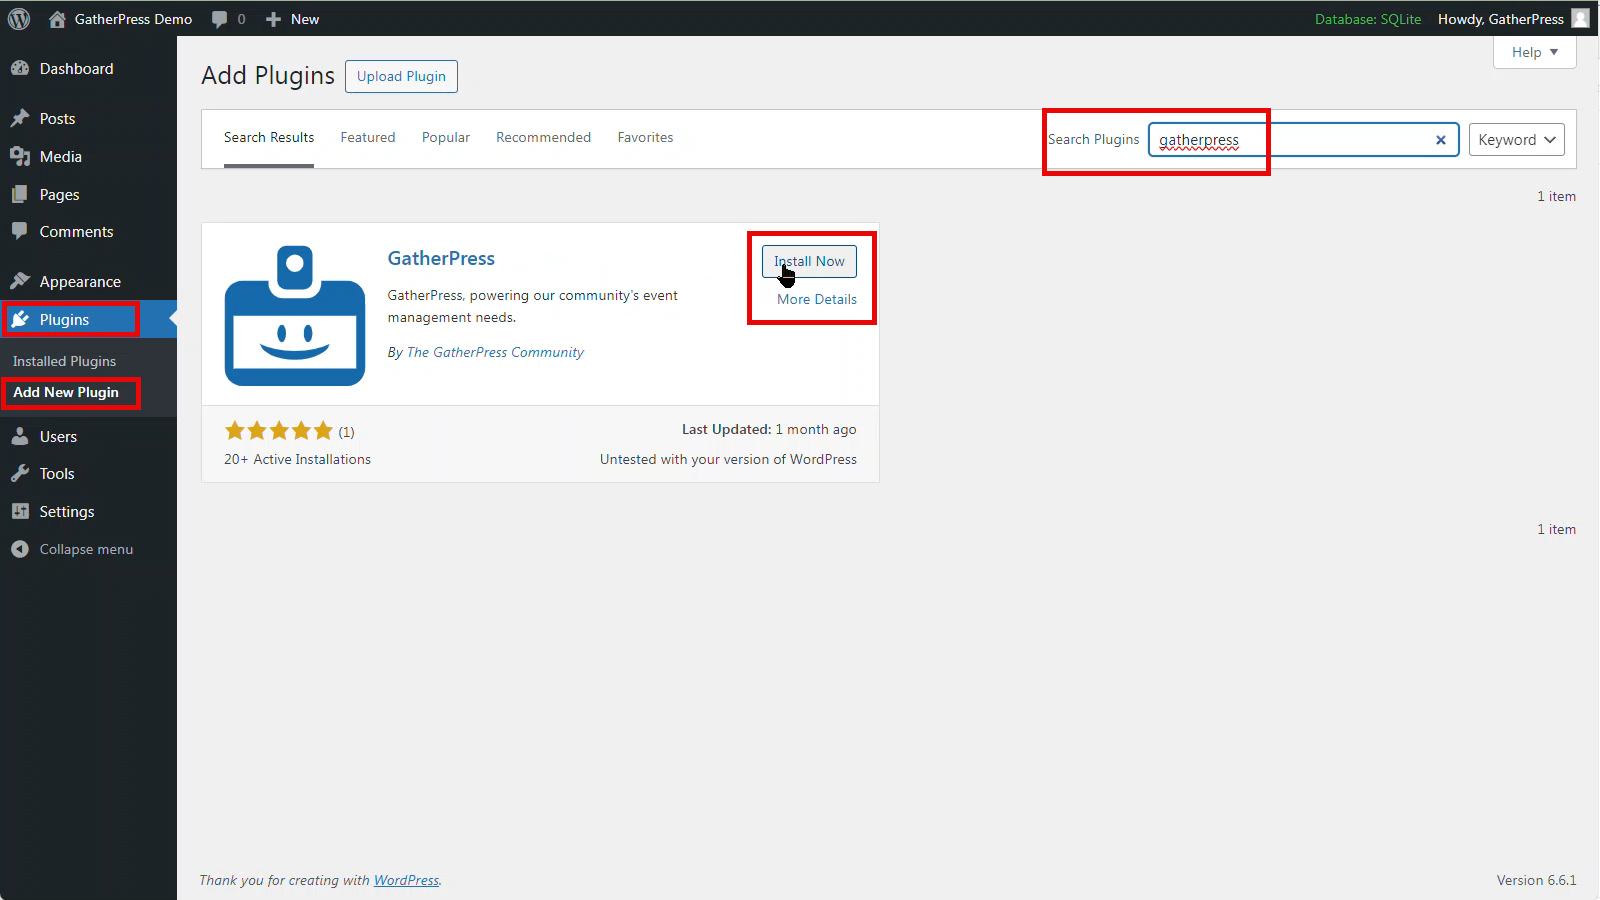
The easiest way to install GatherPress is by using the native Plugin Screen within WordPress.
To install, navigate to Plugins > Add New Plugin and then type into the search box GatherPress.
Once located, choose Install and then Activate
- GatherPress Alpha
Why is GatherPress Alpha needed?
As we continue to refine and develop GatherPress, please use the GatherPress Alpha plugin alongside the core GatherPress plugin. The Alpha plugin helps manage breaking changes effectively.
How to Determine Which Version to Install
- Check Your GatherPress Version: Go to your website’s admin, navigate to the “Plugins” section, and locate
GatherPress in the list of installed plugins. Note the version number currently installed. - Find the Matching Release: Visit the Releases section on this page (or the relevant repository) and locate
the release that matches the version of GatherPress you have installed. - Download the Plugin: Under the Assets section of the matching release, find and click on gatherpress-
alpha . zip to download it. - Install the Plugin: In your website’s admin, go to Plugins > Add New Plugin and upload the gatherpress-
alpha . zip file you just downloaded. - Repeat for Updates: Follow these steps for each GatherPress update to ensure compatibility.
- Activate the GatherPress Alpha plugin. Ensure the standard GatherPress plugin is also active.
- Navigate to the Alpha tab under Events -> Settings in the WordPress admin.
- Click Fix GatherPress! to resolve any compatibility issues.


Advanced Method
GatherPress Alpha also has a WP-CLI you can run to fix GatherPress. Simply run:
wp gatherpress alpha fix
- GatherPress settings
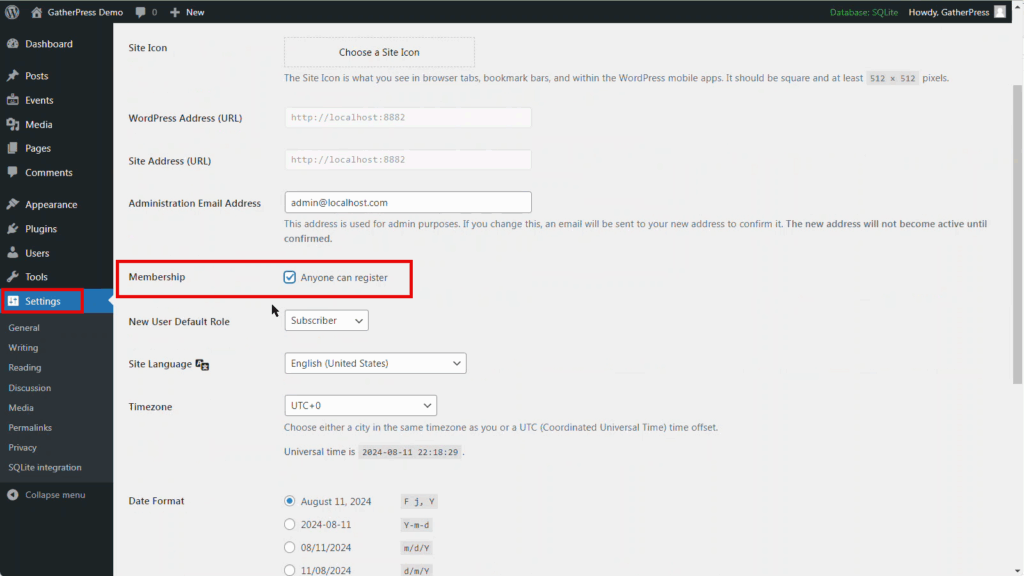
Allow site registration
To provide visitors to your website the ability to RSVP to events, you’ll need to allow site registration.
To allow users to register on your site, head to Settings > General > Membership and tick the box next to Anyone can register
If you run a multisite, this is done at the network admin level: Settings > Network settings > Allow new registrations
GatherPress settings
All settings for the GatherPress plugins are located in Events > Settings > General
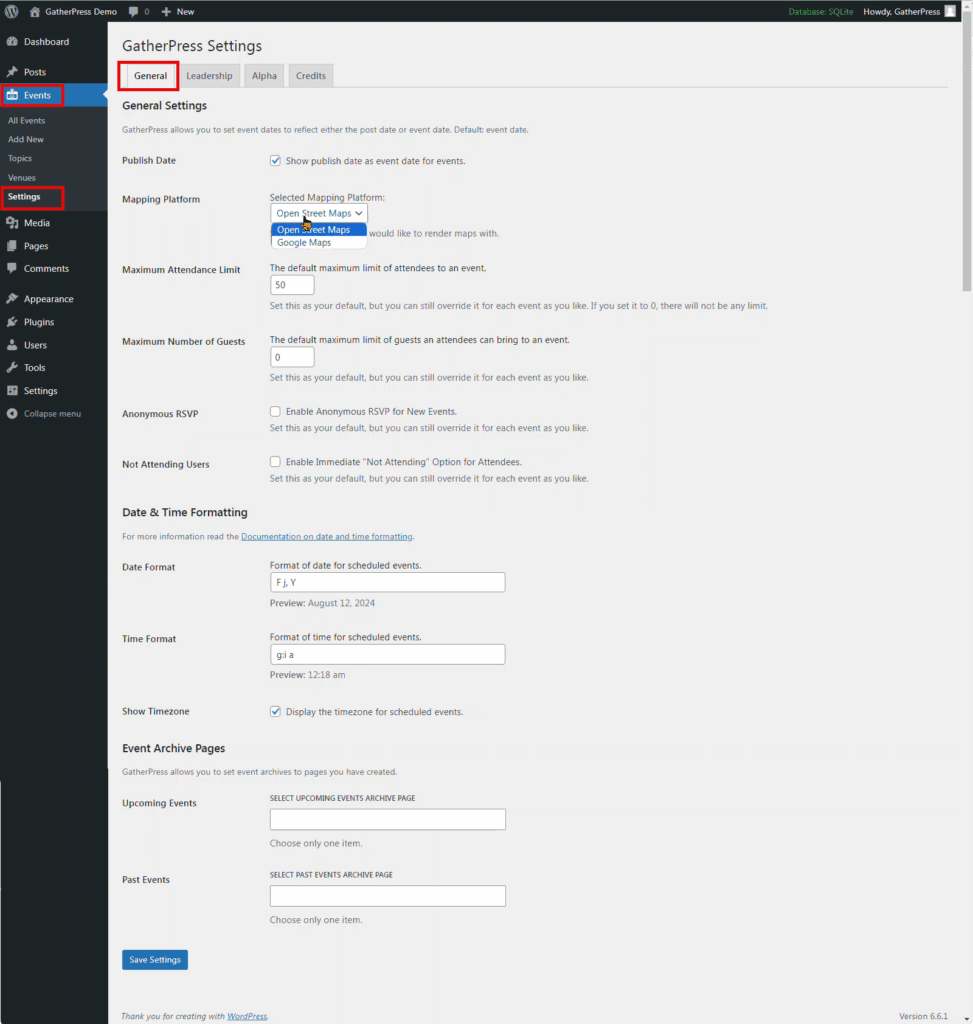
Publish Date As default, the event date is used as the date of the event you’re adding to your website. You can toggle this change here to use the publish date instead.
Find the Matching Release You can select from two providers for Maps which are displayed on the event page. The default is Open Street Maps, but can be changed to Google Maps here.
the release that matches the version of GatherPress you have installed.
Maximum Attendance Limit This option allows you to choose the default number chosen as the maximum number of attendees you can have for an event. This is useful if you use the same venue which may have restrictions on occupancy. You can also amend this value on any event page. Choosing 0 will remove any limits.
Maximum Number of Guests Similar to the previous option, this allows you to choose the default used for numbers of guests.
Anonymous RSVP You can tick this box to allow attendees to provide an anonymous RSVP. It can be amended on each event page.
Not Attending Users You can tick this box to allow the system to immediately choose ‘No Attending’ as their RSVP response when confirming attendance at an event. It can also be amended on each event page.
Date and Time Formats Date and Time formats can be chosen here. These use the standard PHP formatting characters
Event Archive Pages You can choose a specific WordPress page to be used for the Upcoming Events and Events Archive pages here.
Leadership
You can choose the organizers who arrange the events on the Events > Settings > Leadership section
To choose an organizer, type their username into the relevant box, and follow with a comma , to add multiple people

- Create or edit a venue
Allow site registration
Go create a venue, head to Events > Venues > Add New
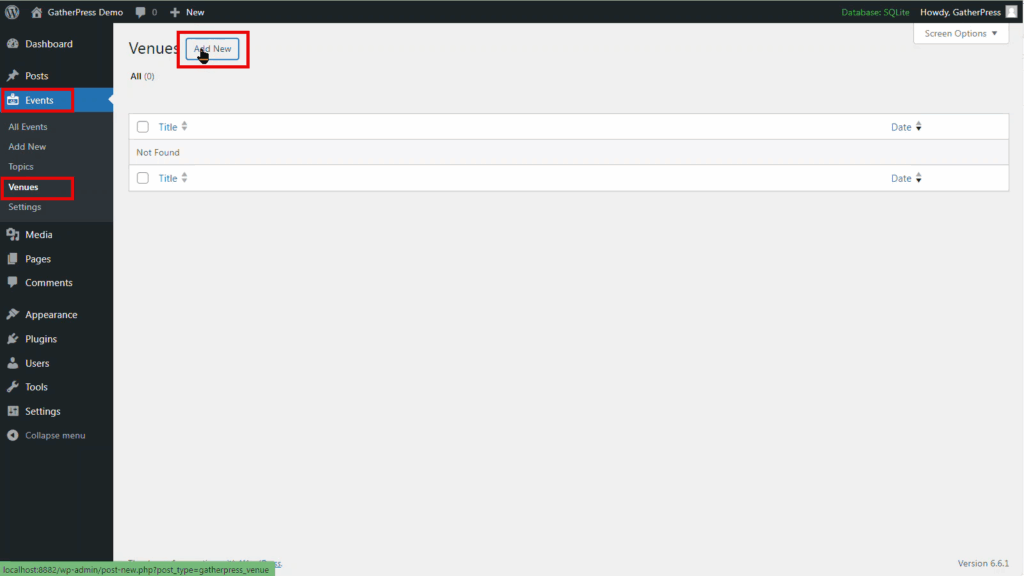
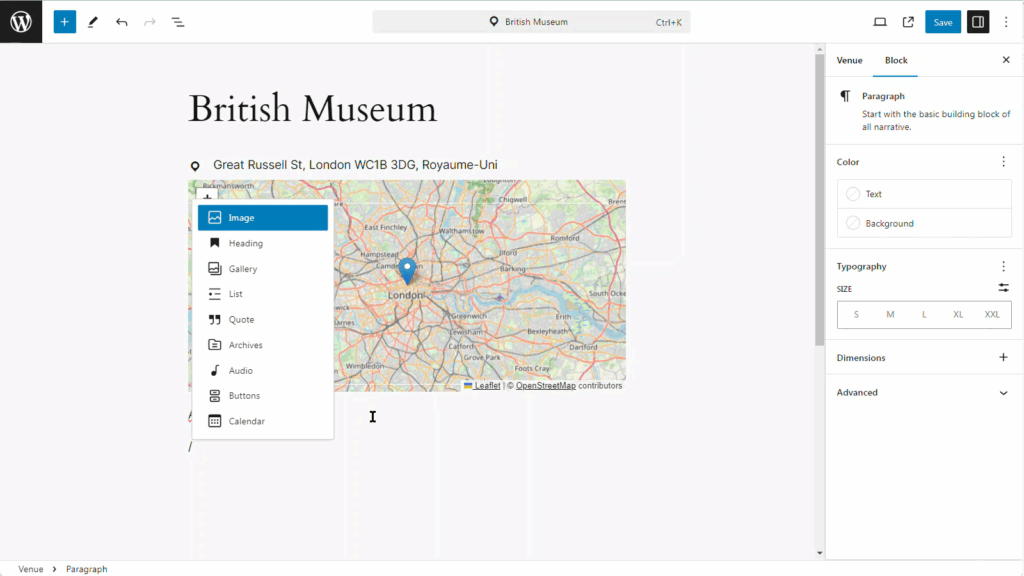
The venue pages are similar to standard WordPress pages and use the familiar editor screen. The title of the page is used as the venue name.
You can provide relevant venue information in the sidebar. Here, you’ll be able to provide relevant information about the venue such as the street address, phone number and website. The map will show automatically show in the body of the page. You can choose to display the map or not, as well as its zoom level and height using the display the map toggle button.

You can also add standard blocks to the page to customize the venue page as you’d like.
- GatherPress topics
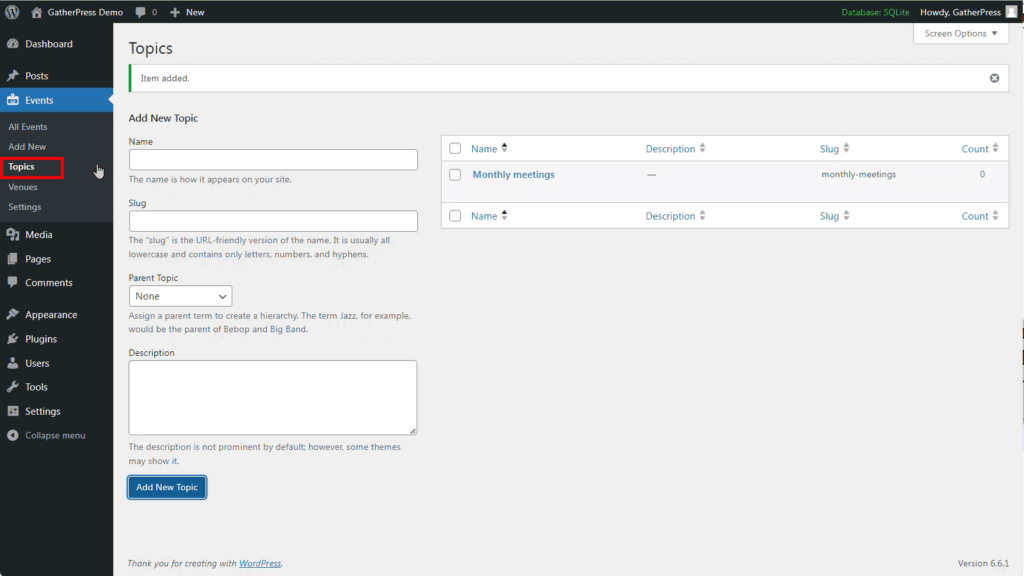
Topics are used by GatherPress to categorize your events as a standard taxonomy feature.
You can create topics under Events > Topics and these can then be selected for your events.
- Create or edit an event
To create an event, head to Events > Add new (or Events > All events > Add new (button))
Once in the editor, add a title – this will be used as the name of your event.
A range of options are then available through the sidebar.
Date and time
To set the date and time, click on the relevant block and change the date and time on the right sidebar. The default time zone, date format and time format are defined in the 2. GatherPress settings

Venue, online or hybrid
If you created venue(s) (see 3. Create or edit a venue), you’ll be able to select it in the dropdown.
If your event is online, select the Online event option in the drop down and then a box will appear to add your online meeting link.

To have an hybrid event, with both a venue and an online link, you’ll need to add a second time the Venue block
You can also add any block in the body to customize your event page.

Additional Features
On the right sidebar under event, you can also add a featured image, change general post settings, and also select your event topic.